How to make wrapped leather bracelets
Mar
08

Triple-wrap leather bracelet with blue tigereye beads

Five different leather wrapped gemstone bracelets designs: green opal, mookaite, African turquoise, hematite and rhodonite
- 4-6mm round beads We used gemstone beads, but glass, crystal beads or pearls would also be lovely. The number you need depends on how many times you want to wrap the bracelet around your wrist. Larger beads work too – but they will start getting heavy on multiple-wrap styles. All the bracelets pictured in this post use 6mm. Our new wrapped bracelet kits use 4mm beads. <– The kits are great, because once you make your first bracelet, you’ll have plenty of thread and needles left over with which to make many more!
- Leather cord Our examples use Greek leather. Both the 1.5mm and 2mm worked great.
- Thread Needs to be sturdy and able to pass (doubled) through your beads twice. Pick a color that matches your leather or that provides a pretty contrast. We used size D Super-Lon (specifically, the earth assortment). We now have tubes with all black or all brown bobbins available too!
- Button or bead for the clasp. Rings & Things has some pretty buttons from TierraCast.
- Required tools: needle (size 12 is a good general choice), scissors, work surface with clips or clothespins.
- Optional tools: needle threader, thread conditioner, glue (GS Hypo Cement, Bead Fix or other fabric-friendly adhesive for extra security on your knots).
- Choose your bracelet length and cut your leather. The formula is double your finished bracelet length plus extra for making the knots. For single-wrap bracelet, measure your wrist and then triple that number to get the length of leather needed (7″ wrist = 21″ of leather). For a triple-wrap, multiply your wrist by seven (7″ wrist = 49″ leather). It is better to leave your leather too long than to end up with not enough.
- Cut a long piece of thread (10-12 feet) and thread your needle. Knot the end of the threads.
-
Holding the thread by the knot, let the needle fall to the ground so
it is centered on the thread. Fold your piece of leather in half,
leaving a loop large enough for your button to fit through. Holding the
knot-end of the thread with the leather, tie an overhand knot so that
your thread and leather are now connected.
 Make sure your button will fit through the loop before you tighten the knot.
 -
Using binder clips or clothespins, attach your loop to the top of a piece of cardboard. Use a second clip to attach the leather ends to the bottom of your board (leave the thread loose).
- Starting with your thread in the middle of the two strands of
leather, wrap the thread OVER the right strand to the outside, then
UNDER the right, OVER the left to the outside, then UNDER the left and
OVER the right. It is a simple figure-8 stitch.
Do this 5-6 times, pulling the thread tight around the leather to
form a binding. (The pattern could go either way, but since I’m
right-handed I’m going to describe it this way. Reverse it if needed!)
Here is a close-up of the lashing:
- Now you are ready to start adding beads. After your thread has passed UNDER the left leather, add a bead. Hold the bead between the two strands of leather, and stitch the thread OVER the right, back UNDER the right, THROUGH the bead hole again and OVER the left. Bring the thread UNDER the left and add another bead in the middle. Repeat many many times! Keep the beads pulled in snugly against the leather. Pay attention so that your stitches all face the same way. If your thread seems to snag a lot, use a bit of thread conditioner or beeswax on it.
- To finish the bracelet, form several stitches without beads, just
like you did in step 5. Now you are ready to attach your button or
bead. Ideally, you’ll have enough leather left to tie on a button with a
nice knot on the back and trim the ends.
If somehow you come up short, all is not lost. You can tie a disk bead onto just one strand of the leather (use glue to enforce your knot), like on the 2nd bracelet from the left. Or if your ends are really short, use a hook-end crimp, as shown on the pink bracelet on the right.
 If your button has a small loop, you might need to miter (angle) the leather end and pull it through with pliers.
 - If desired, add a touch of glue to the knots to ensure the thread is gripped securely by the leather. Trim ends as needed.
- String your button or bead clasp first, then tie a series of knots on the end to make the bracelet length adjustable.
- Use jump rings to attach a couple of charms, like on Mollie’s Belle Star bracelet.
- Leave the leather tails long and add beads or decorative knots.
- Substitute a different type of cord for the leather, as in Tracy’s rattail and dragon blood jasper design:
(SOURCE : http://www.rings-things.com/blog/2011/03/08/how-to-make-wrapped-leather-bracelets/.VIf788mWkoI#.VIf9X8mWkoI)
+++++++++++++++++++++++++++++++++++++++++++++++++++++++++++++++
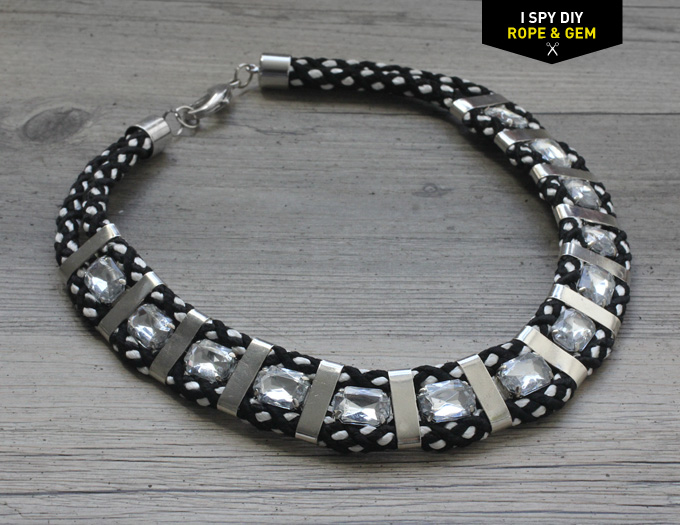
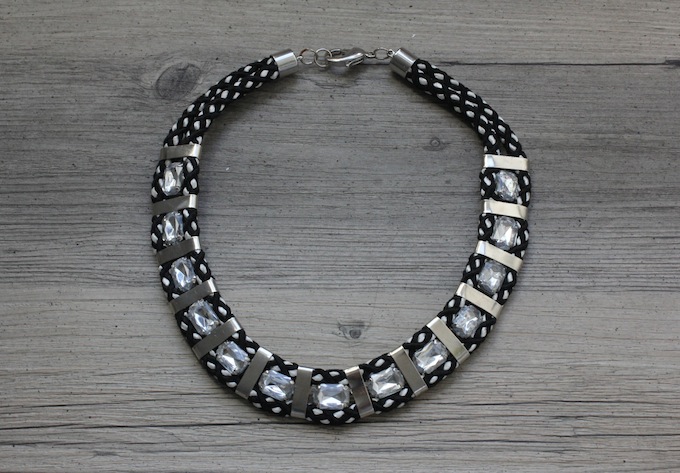
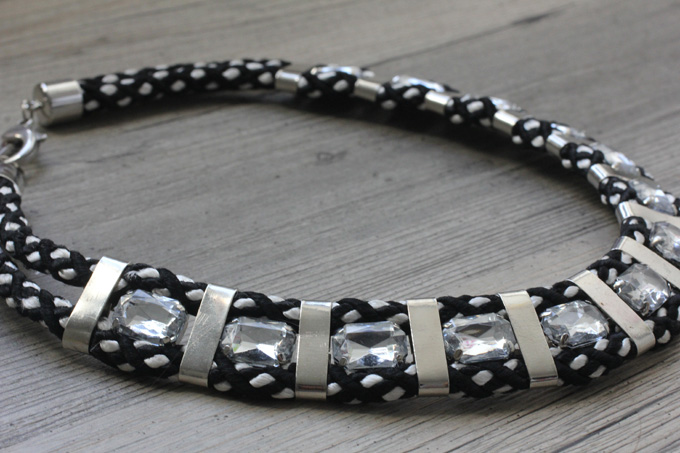
MY DIY | Rope & Gem Necklace


 After cleaning out my DIY closet and finding some supplies, I decided
to kick off the new week with a DIY. I bought these silver
connector/crimps forever ago knowing I wanted to make a necklace with
rope, after spotting them in my closet I thought it was about time.
Combined with some leftover rope (remember this rope DIY) and some gems, I have a new statement necklace! Steps after the break…
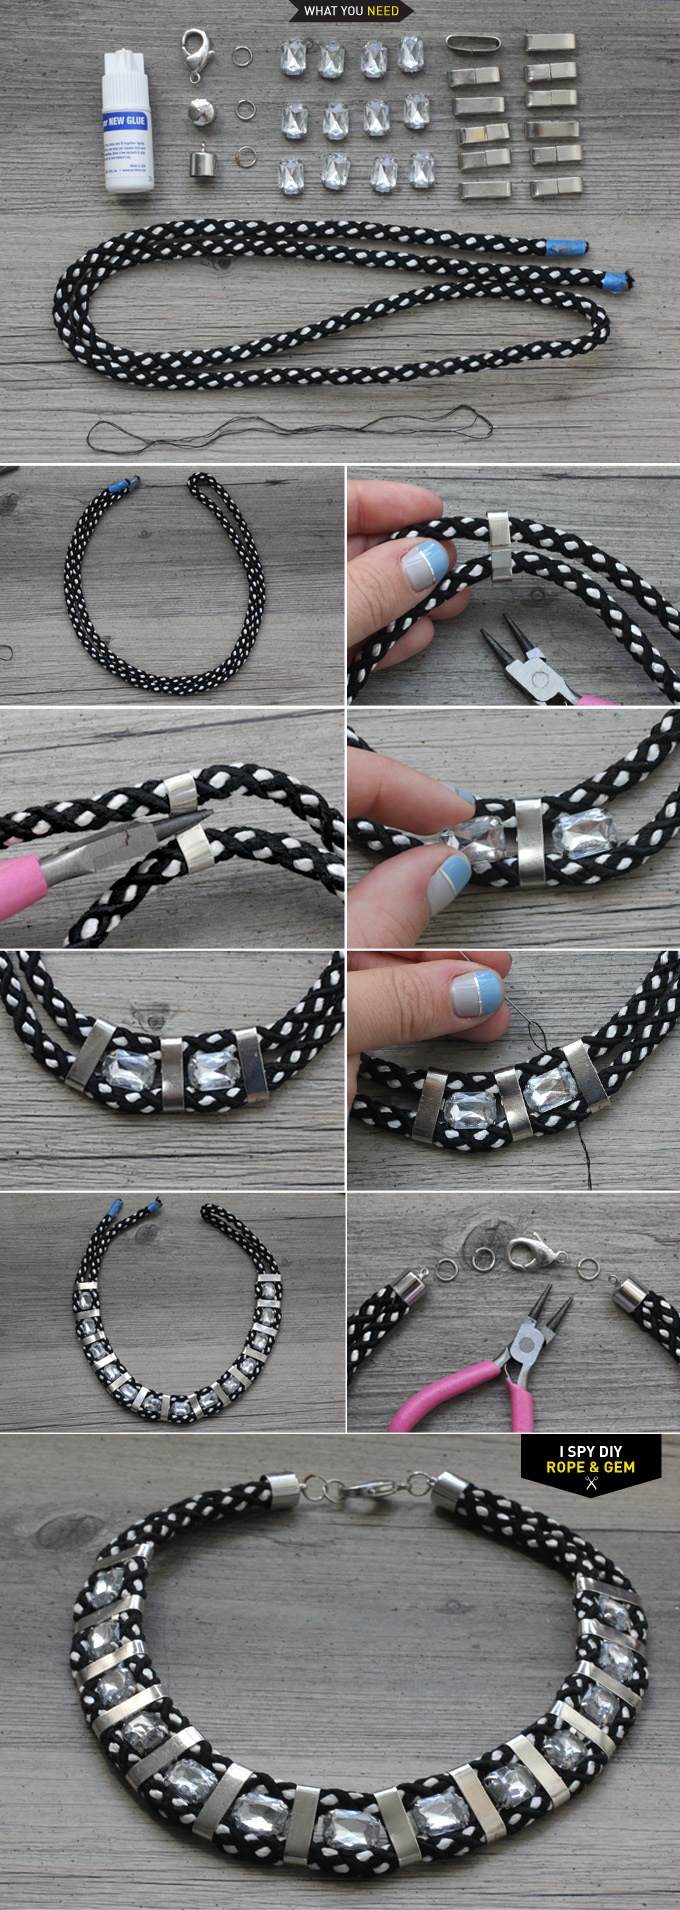
What you need:
Rope (options here and here)
Gem
Connector (similar here)
End caps
Lobster Clasp
Jumpring
Super Glue
Needle and Thread What to do:
First double up your rope and use the connectors to join the two pieces of rope.
Staring from the center, alternate between the connectors and the gems.
To secure the gems, place between the ropes, then sew to each pieces of rope.
Once you have added all your gems and connectors, finish the ends of your necklace by wrapping tape around both pieces of rope, and trim to length.
Adhere rope ends to the end cap with superglue, then add your jump-rings and lobster clap.
(SOURCE : http://ispydiy.com/my-diy-rope-gem-necklace/)
++++++++++++++++++++++++++++++++++++++++++++++++++++++++++++++++++++++


LOVE SPELL CASTER (DR. OZIL) THAT HELPED ME BRING BACK MY DIVORCE HUSBAND http://drozilsolutionhome.website2.me/ VIEW HIS WEBSITE AND CONTACT HIM NOW FOR ANY KIND OF HELP
ReplyDeleteWith so much in my heart i am here to express myself on how Dr. Ozil saved my marriage from divorce. Myself and my husband were having some misunderstanding and it was tearing our marriage apart to the extend my husband was seeking for a divorce. So i have no option than to go to the internet to seek for solution to my problem it was there i came across Dr. Ozil details and about how he has helped a lot of people by restoring there relationship. I contact Dr. Ozil and in less than 48 hours my husband cancelled the divorce papers. Now myself and my husband live together in peace and harmony all thanks to Dr. Ozil for saving my marriage from breaking up. Dr. Ozil contact information are via email: drozilsolutionhome@yahoo.com or call his phone number or WhatsApp: +2348161897826 and also view on his website for more reviews about him: http://drozilsolutionhome.website2.me/.
Are you in bad need of love spell to bring back your ex lover or reunite your marriage? contact Dr Sam for fast 48 hours solution. I had a problem with my husband a year and six months ago, which lead us apart. When he broke up with me, I was confuse and did not know what to do to get him back, I felt so empty inside. Until i came across Dr Sam on the internet on how He has helped so many people solve there various problem. I emailed Him and I told Him my problem and i did what he asked me to do for him to help me, to briefly make the long story short, Before I knew it, in less than 48 HOURS, my Husband gave me a call and he came back to me and told me he was sorry about what was going on between the both of us. Finally I am writing this testimony to offer my thanks and deep gratitude to you Dr Sam for keeping to your words and your promises in bringing him back to me in just 48 hours of your powerful spell casting, and for using your gifted and great powers to bring him back. If you need his help, you can email him at ( okokakspellhome@gmail.com ) or add Dr Sam on WhatsApp ( +2349060421250) or call him get all your problems solve No problem is too big for him to solve..Contact him now THANKS TO Dr Sam
ReplyDelete